Monday, December 31, 2012

New Release Blog Hop...

***BLOG HOP GIVEWAY ALERT***
For our Blog hop giveaway, there will be 2 winners chosen from ALL the comments combined!  This FIRST winner will have a "GUEST DESIGN SPOT" for our next release & the SECOND winner will win a $25 Gift Card to my store!  All you have to do is leave a comment here along w/the rest of the design team's blogs AND also leave a way for us to contact you!  Emma will use random.org to pick the lucky winners!  All you have to do is leave a comment on all blogs in this hop for more chances to win! The deadline is Sunday, Jan 6th at midnight! I will announce winners on my blog on Tues, Jan 8th!  EASY PEASY!!! GOOD LUCK!:)

Yea!!! It's new release time. We have put together a blog hop for you to see ideas using Miss Emma's newest release. There is some awesome stuff in this set. So, lets get on with what I made for the blog hop. Hope you like! And don't forget to leave some love on each post for a better chance to win some goodies from Emma.

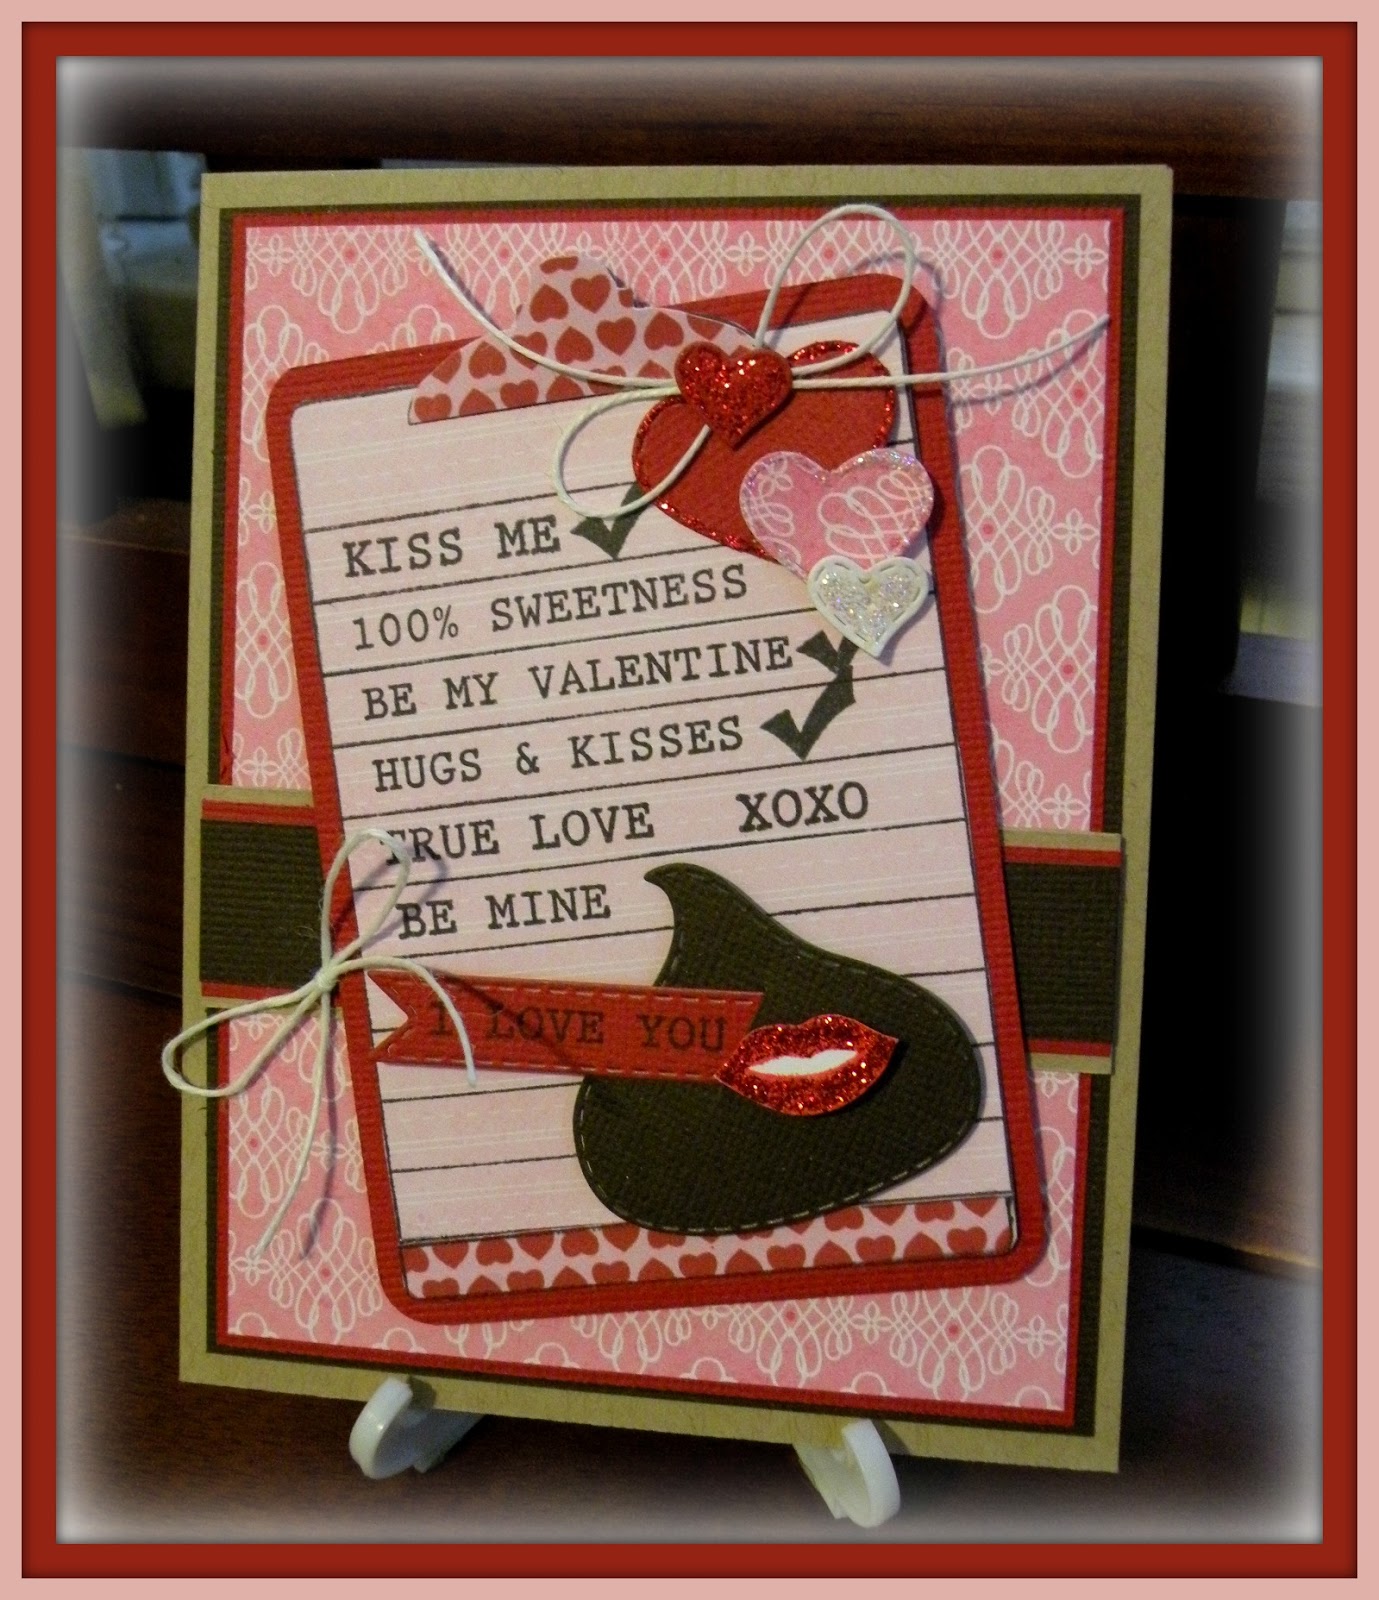
Ahhhh!!! How cute is this Postage Stamp Die?! This is an awesome little frame and I know you will go to it often. So versatile and I know you will find many cool ways to use it. I saved the center piece that gets cut out when you run it through you Cuttlebug. I used that to cut the hole in the front of the card, creating a window.

I love the new chunky glitter I got from Stampin Up. It really added a ton of sparkle to the edge of the heart die. These hearts layer up so nicely...gives a great look with the added dimension. I also made a bow out of my stash of crinkled seam binding ribbon. Love that stuff!

I am building my stash of Copic markers and learning a bit about coloring with them. I used them to color in these beautiful roses from "Bloom Where You Are Planted" stamp set. I then carefully cut them out by hand. I have a lot to learn but I think these came out rather pretty!

See the window? I like how you can see inside, and when you open the card the stamped sentiment is on the inside. I cut the die out of designer paper and chip board. It makes it much thicker and adds just that bit of dimension. I also ran the black layer through my Cuttlebug using a textured embossing folder. 

Stitched Postage Die ~ New Release
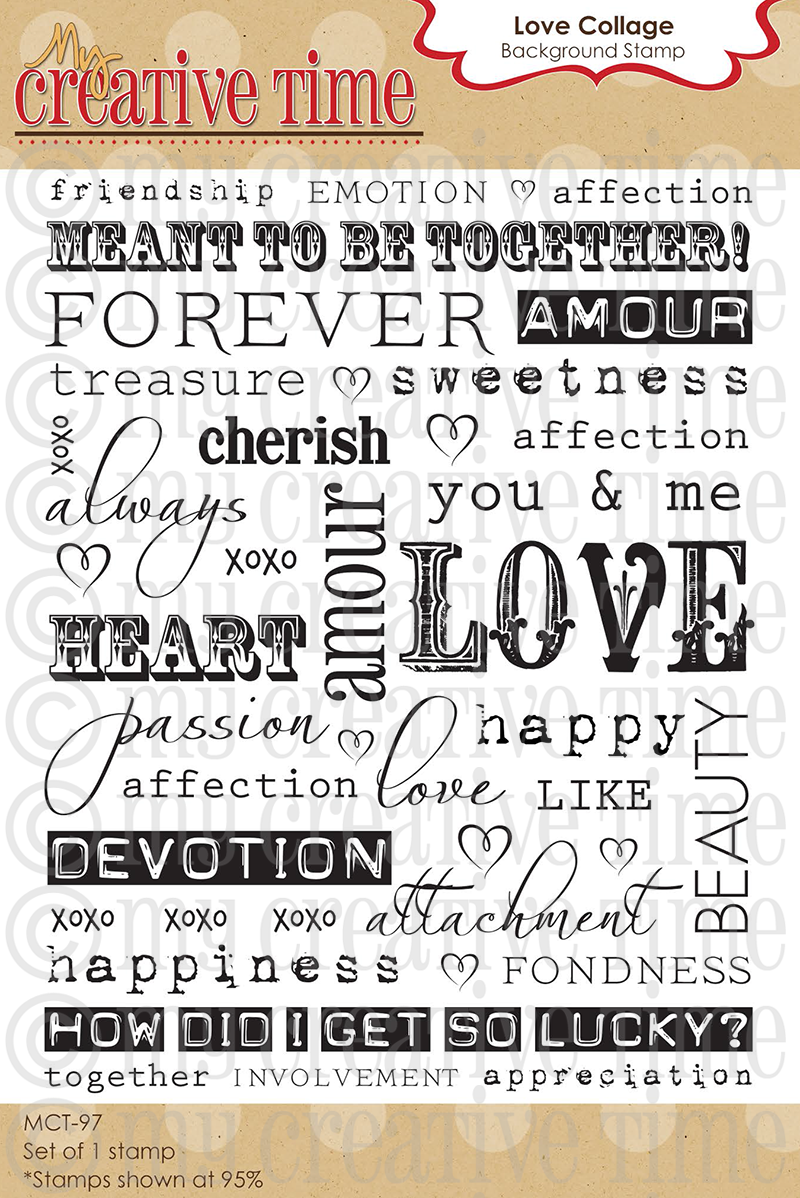
Lots Of Love Stamp Set ~ New Release


And here you go.....a peek at all the new things in this awesome release!


http://shop.my-creative-time.com/New-Release_c40.htm

P.S. If you watched Emma's  video today in it's entirety, she had a few announcements in there for you! The MAIN announcement she wanted you all to know is that starting TOMORROW (Monday, December 31st) @ 8am PST, you can use the code: NEWYEAR at checkout in her store HERE to get 20% off your entire purchase! YEP, that is even including ALL of her stamps that are 40% off right now here! This sale will end on Sunday, Jan 6th @ midnight PST! 

Here's the blog line up...head out and get lots of great ideas to use with this set! Make sure you leave comments for your chance to win!

Cheryl ~ Me


Sunday, December 30, 2012

Stitched Scalloped Heart Die...

Sneak Peek Giveaway Time!With all of our Sneak Peek weeks, Emma likes to do some FUN giveaways!
 ***All you have to do is leave comments on our blogs! You do NOT have to comment on every blog, BUT if you do, you will just have more chances to win!
 ***SPREAD THE WORD TO THE WORLD ON FACEBOOK about this release & whatever connections you may have! Let us know on "My Creative Time's" FB page here http://www.facebook.com/#!/pages/My-Creative-Time/364568506334 that you did so! OR you can just tag me in your post!
 Emma will randomly pick & announce all winners on Monday, Dec 31st during the release happening @ 8:00am PST in her video! GOOD LUCK!


Aren't these dies just the cutest?! I love how feminine this heart looks. It is just so pretty. Ok, so I cut the inner heart 4 times and scored down the center of each. I glued them back to back to get this fanned look. I like how it gives added dimension to the card. You could probably still mail it as the hearts will lie down and pop back to life when the envelope is opened.


Here is closer look at the way I did this heart. I also used my glue pen around the edges and sprinkled on Martha Stewart glitter. I did the same on the inner part of the scalloped heart. I love how it sparkles to nice.


For the bow on this card, I wanted a clean tailored look. I wrapped the ribbon around the layered paper and tied a very simple bow. I like how it looks. The sentiment is from an older Valentine stamp set and I'll have it for you at the end of this post. I rounded the corners, layered it on black. Rounded those corners and popped it on some designer paper. I used my glue pen again in the center of the tiny hearts and sprinkled with glitter. Quite happy with the look of this card. Here is what I used.


Ok, so I decided to whip up one other little thing using this die. It's just too cute not to use...I couldn't stop! Anyway, this is just  a little note card to give with a gift, some candy, or just a love note.


I used the 3x3 trifold card die to make this cute little card. I love how it came out. I also used one of the rolled flower dies and then added some glass glitter. I used Glossy Accents as the adhesive as this is quite chunky glitter. I think it looks sugared! I tied a ribbon of crinkled seam binding ribbon, hot glued it under the flower, and hot glue it in the center of the heart.  Used the Teeny Tag Greetings Stamp & Die set for the tag. The cluster of hearts is made using the second heart die that comes with the Stitched Scalloped Heart Die, and the others are from the Stitched Heart Layering Dies.


For the inside of the card I simply stamped using the Small Talk Stamp Set. Trimmed it down to just outside the stamped border.


The other week Pick Your Plum had these cute paper clips that came in three sizes and two different metals. They are ADORABLE! I had to get them...lol. I used Glossy Accents to glue the hearts to the paper clip and this just slides on to close up the card. Super cute, right?! It hangs off the edge a bit, but that's no problem and in fact, it's rather cute.
So. there you go. Two cute little projects using an awesome die! I hope you go away with some ideas to use in your own projects. Be sure you leave comments on the other designers projects for your chance to win something from Miss Emma!
Here's what I used on this project.

Card Sentiments Stamp Set w/ 3x3 Trifold Card Die
Small Talk Stamp Set
Stitched Heart Layering Dies
Stitched Scalloped Heart Die
Teeny Tag Greeting Stamp Set
Rolled Flower Dies


P.S. If you watched Emma's  video today in it's entirety, she had a few announcements in there for you! The MAIN announcement she wanted you all to know is that starting TOMORROW (Monday, December 31st) @ 8am PST, you can use the code: NEWYEAR at checkout in her store HERE to get 20% off your entire purchase! YEP, that is even including ALL of her stamps that are 40% off right now here! This sale will end on Sunday, Jan 6th @ midnight PST! 

Saturday, December 29, 2012

Sneak Peek for Valentines Day...

Sneak Peek Giveaway Time!With all of our Sneak Peek weeks, Emma likes to do some FUN giveaways!
 ***All you have to do is leave comments on our blogs! You do NOT have to comment on every blog, BUT if you do, you will just have more chances to win!
 ***SPREAD THE WORD TO THE WORLD ON FACEBOOK about this release & whatever connections you may have! Let us know on "My Creative Time's" FB page here http://www.facebook.com/#!/pages/My-Creative-Time/364568506334 that you did so! OR you can just tag me in your post!
 Emma will randomly pick & announce all winners on Monday, Dec 31st during the release happening @ 8:00am PST in her video! GOOD LUCK!
 Log onto to your facebook now & let start spreading word!;)


This chocolate die is to die for...lol! How cute is that?! And that little flag that goes with it, and all the great little phrases. This can and will be used for anything! I pulled out an older stamp set for this and they will all be listed at the end of this post.


I used the Stitched Heart Layering Dies for this card. I love these...they are just the perfect size to tuck into any project. Who doesn't love hearts! I jazzed them up with some Stickles and some jute from Liz's Paper Loft Boutique. I took the stamp from the Honey Do List Stamp Set and I cut around just the lined part. The I stamped it again on different paper and cut out the clamp at the top and the little strip at the bottom. I stamped the entire thing again on red card stock and this time I cut on the outside line. I layered one on the other, added a tiny dimensional under the clamp, stamped a couple of check marks, and added my little hearts and jute.


I went through and picked a bunch of the sentiments that were perfect for Valentines Day. I added them to my "list" and even checked off a few. That was a last minute addition and I'm glad I did it! Sometimes I do something like that a regret having done it...not this time. though. I think it actually added something to the card. And check out those lips!

I hope you love this release as much as the design team does! I can't wait to see what some of you do with this great set. Don't forget to leave some comments for a chance to win a great prize from Miss Emma!

Chocolate Greetings Stamp And Die Set ~ New Release
Stitched Heart Layering Dies ~ New Release


Sunday, December 16, 2012

Very special birthday...

Made a very special birthday card for a very special lady....my Mother! She is turning 80 and I thought these little candles and this sentiment was too funny!


These stamps were in the latest stamp set from Peach Keen for their stamp of the month club. How cute are these guys?! And I thought the face stamps I chose say it all....for an 80th birthday.


Isn't it cute? I colored them with my Prismacolor colored pencils and Gamsol. If you Google it, you will find lots of videos for instructions. 


I know my Mother will get a kick out of these expressions. She is still very active, doing craft shows of her own. A retired florist, she still does arrangements and goes and sets up several craft shows every year...several times a year! You go Mom!!!


How funny is this little stamp?! I couldn't resist...really, 80 candles on a cake? Heck ya, it would get kinda hot! Wish I could be with her to celebrate, but she knows how much I love her and how proud I am to call her Mom. She's a wonderful example of a Godly woman who has had way too much loss in her life. And yet, her faith has never wavered. Thanks, Mom, for who you raised me to be. I would not be who I am today without loving parents who instilled a solid foundation of faith!


Thursday, December 13, 2012

Elf Shoe...

Here is a super duper cute little elf shoe I made. This is going to be a gift, but I wanted to post it before giving it away. This file is from SVGCuts, and the whole set is Elf themed. Super cute stuff. 

How fun is this?! The papers I used are from Echo Park's Seasons Greetings collection. I have a 12x12 printer at home and a Continuous Ink Supply System, so I print all my designer papers at home. I never have to worry about running out of that one paper that you just love! I am so happy that I invested in this system! 

I added tiny jingle bells with twine to each little point on the cuff of the shoe. It just dressed it up so nicely! And they jingle just a tiny bit....so cute! I also took my gold Stickles and added it all around the top edge. Love that bit of sparkle.

Couldn't forget about the toe! I clustered three little jingle bells together, tied with twine, and hot glued it to the toe. This project puts a smile on my face....it's so cute!

Lastly, I used one of Emma's dies and stamps to add a greeting. I made some crinkle ribbon, tied into a bow, stamped the greeting and hot glued it to the front of the shoe. Tied a tiny bow with twine to finish it off. I love Emma's stitched dies, they add just that little extra to my projects. This die is out of the Build A Banner Set. I inked the edges a bit to tone down the harsh white color of the paper. It made it blend a bit better with the printed papers I used. I filled it up with candies and now it is ready to be given away. I am definitely making another one for me, cause this is just so cute! You need to head over to SVGCuts and get this file for yourself! If you make one for you or to give away, you will have lots of fun putting this together. It's not hard at all...just take your time and line up the edges good, and it will all come together just right!


Wednesday, December 12, 2012

HUGE GIVEAWAY ALERT!
Okay, since it's Christmas, Emma decided to give away TWELVE of her FAVORITE things to ONE LUCKY person! She will announce one of the prizes for each day in her video! So by the 12th day, you will see ALL 12 items that ONE lucky person will be receiving! All you have to do is leave your comments each day! It's that simple! ALSO, **VERY IMPORTANT** Please leave your contact information so we can contact you "IF" YOU are the lucky winner! 

Wow, the 12 days are now over. I had so much fun designing projects, but as much fun looking at all the great stuff the other members of our design team made! So, here is my final project for our blog hop.

Now, who doesn't want a bit of chocolates at holiday times? This is totally something you could whip a bunch of in no time flat. I bought these little clear bags from Clearbags. I swear these were made perfectly to hold the Hershey Nuggets. It holds 6 with enough room to fold over the top. And then you can design some super cute toppers for them.

I used one of the new sets with the Vintage Stitched Label die. I didn't stamp on it all all. It's just the base for the cute fibers and button. These labels can take even the simplest project, dress it up, and it becomes a super cute treat to give. The button/flair is from Paper Play Studios. She has lots of cute flair. You can find Tamara on Facebook...her site is down for maintenance. I simply made a backdrop with some red fiber type ribbon I have, tied a little bow with hemp for Liz's Paper Loft Boutique, added the fair, and with that, you're finished! Now, how easy are these?!

I made one other using a different set of dies.
 
Same thing, totally different look. For this one I used the same Vintage Stitched Label Die, but folded it in half vertically. I then made a topper for it using the Scallop & Stitched Circle Die. I used a stamp from All Around Goodies Stamp Set. I have a stash of tiny little buttons for all seasons and found this cute little snowman to put in the center. 
 
Again, I wrapped a bit of hemp around and tied a little bow. These aren't super fantastic creations, but sometimes you need a bunch of something, and these are so easy to do, you could make a whole lot in a very short time. Great for teachers, the mail carrier, tuck in a stocking, co-workers...the list could go on and on. Make some of these for yourself, they will be loved by whoever you give them to.

Paper Play Studio ~ Doing maintenance

Don't forget to hop, leave some comments, and one winner will be chosen to receive an amazing set of Miss Emma's favorite things. I'm telling you, it is an awesome gift!


Tuesday, December 11, 2012

Tea light snowman door hanging...

HUGE GIVEAWAY ALERT!
Okay, since it's Christmas, Emma decided to give away TWELVE of her FAVORITE things to ONE LUCKY person! She will announce one of the prizes for each day in her video! So by the 12th day, you will see ALL 12 items that ONE lucky person will be receiving! All you have to do is leave your comments each day! It's that simple! ALSO, **VERY IMPORTANT** Please leave your contact information so we can contact you "IF" YOU are the lucky winner! 

I'm telling you, the projects for this 12 day hop, have been amazing! I have gotten so many new ideas...these ladies are awesome! So, I have another tea light project for you...told you there were addicting! This is a much bigger snowman, in fact, I have it on my door. So then, let's get on with it.

Ahhhh, so cute, isn't she?! I think so anyway. So, cut yourself 3 circles...the face is about 2.5 inches, so that gives you an idea of how to size the rest. I used the hat from the Treasure Box Designs file and sized it to fit the 2.5 inch circle. I used Scor Tape to keep it in place on the plastic tea light. 

Such a cute face...I used my glazing gel ink pen to make her eyes shiny. Added some chalk to give her rosy cheeks, and some white gel pen stitching to finish it off. I stamped the holly leaves and cut by hand, and tied twine in a beautiful glass button from Liz's Paper Loft Boutique. I love those buttons! Tied ribbon around the tea light for the scarf. The branches come out of a file over at SVGCuts.
I love this stamp for Christmas time. It just seems to sum it all up. This is the new Stitched Curly Label Die that layers over the original Curly Label Die....LOVE THEM! I stamped the holly leaves and cut out by hand and added a red bead. Added some black buttons as well.

And here she is, hanging on my front door. I think she's cute. It's not overly big for the door, but it adds a bit of something and I try to always have something, anything hanging on the door. So...I hope I inspired you to play around with these battery operated tea lights. Let you imagination go...or do what I did. People will love it and want one of their own. Cute gift....just sayin'.

SVGCuts  ~ Arms

Monday, December 10, 2012

Tea light snowman ornament...


HUGE GIVEAWAY ALERT!
Okay, since it's Christmas, Emma decided to give away TWELVE of her FAVORITE things to ONE LUCKY person! She will announce one of the prizes for each day in her video! So by the 12th day, you will see ALL 12 items that ONE lucky person will be receiving! All you have to do is leave your comments each day! It's that simple! ALSO, **VERY IMPORTANT** Please leave your contact information so we can contact you "IF" YOU are the lucky winner! 


I have seen several super cute little crafts made using the battery operated tea lights. I had to jump in on the action. So here is what I did with mine.

How stinkin' cute is this?! I'm in love with these things...lol. Anyhow, I used an svg file from Treasure Box Designs for the basic design. I created my own file for the face circle because I wanted to use my Peachy Keen Face stamps. The hole for the nose is not centered...it is moved down just a bit to fit where the nose is on the stamp. I also resized the hat to fit the size circle I made for the face, which is about 2.5 inches.

Is that just not the cutest face ever? I love how it flickers a bit when it's turned on. The faces are from Peachy Keen Stamps, and they are 1.75 inches. I used a glossy gel pen to make his eyes shiny. I used some chalks to give him some rosy cheeks. So, basically you sandwich the tea light between the back layer...which is several layers in itself...and the top layer. I used Scor Tape to keep the top layer stuck to the plastic tea light. Worked out good. You can see the info in the file you buy on how to assemble.

And the whole thing comes together so nicely with one of My Creative Time's awesome labels and stamps. This is the Fancy Frame Stamp and Die set, but I didn't use the stamp. I cut a second one in green, cut it in half vertically, trimmed off the bits that would show, and layered the top layer onto them...at the ends. This gives a partial mat, but works out quite well. Did a bit of doodling with my white gel pen and added some red crinkle ribbon. The jute tied around the tea light is from Liz's Paper Loft Boutique...love this stuff!
So that's it! These would be super cute little gifts...get your supplies and make some, they are addictive! Fair warning...lol.